
How to install a bike bell on handlebars is usually a 10-minute job, but small mistakes (wrong clamp size, bad placement, over-tightening) can turn it into a rattly, hard-to-reach annoyance.
If you ride in the U.S., a bell is one of those simple upgrades that can reduce awkward “on your left” moments, especially on multi-use paths, and it also keeps your hands on the bar when you need to get attention fast.
This guide walks you through choosing the right bell for your bar, finding the best mounting spot, and tightening it correctly so it stays put without crushing carbon or marking your grips.
What you need before you start
Most bells install with one screw, but the prep work prevents 80% of “why won’t this fit?” issues.
- Bike bell (band clamp or hinged clamp)
- Tool: usually a Phillips screwdriver or a 2–3 mm hex key (varies by brand)
- Measuring option: quick check with a ruler, or look up your handlebar diameter
- Optional: rubber shim (often included), friction tape, a clean rag
- If you have a torque wrench: nice to have, especially for carbon bars
According to Park Tool, over-tightening is a common cause of damaged components, and using proper torque is the safest approach when a manufacturer provides specs.
Pick the right bell and clamp size (this is where most installs fail)
Before you learn how to install a bike bell on handlebars, confirm the clamp matches your bar where you plan to mount it, not just the “standard size” you assume you have.
Common handlebar diameters (U.S. market)
- 22.2 mm: many flat bars near the grips on some bikes
- 25.4 mm: older MTB/comfort bars, some city bikes
- 31.8 mm: common at the stem clamp area (but bells rarely mount here comfortably)
- 35.0 mm: some modern mountain bikes at the stem clamp
If your bell comes with a rubber shim, it can help adapt a slightly larger clamp to a smaller bar section, and it also reduces slipping.
Quick fit table
| What you see | Likely issue | What to do |
|---|---|---|
| Clamp won’t close around bar | Clamp too small for that section | Move closer to grip area or get correct size |
| Bell rotates when you ring it | Clamp too big or not enough friction | Add shim, clean bar, tighten gradually |
| Bell fits but hits brake lever | Bad placement for your cockpit | Try other side, rotate bell, or use a low-profile bell |
| Ringing sounds weak or muted | Dome blocked or hardware rubbing | Reposition so dome is clear, check screw alignment |
Choose the best spot on your handlebars
Placement matters more than people expect, because a bell that’s hard to reach tends to go unused. Most riders do best with the bell within a thumb’s reach of a normal riding grip.
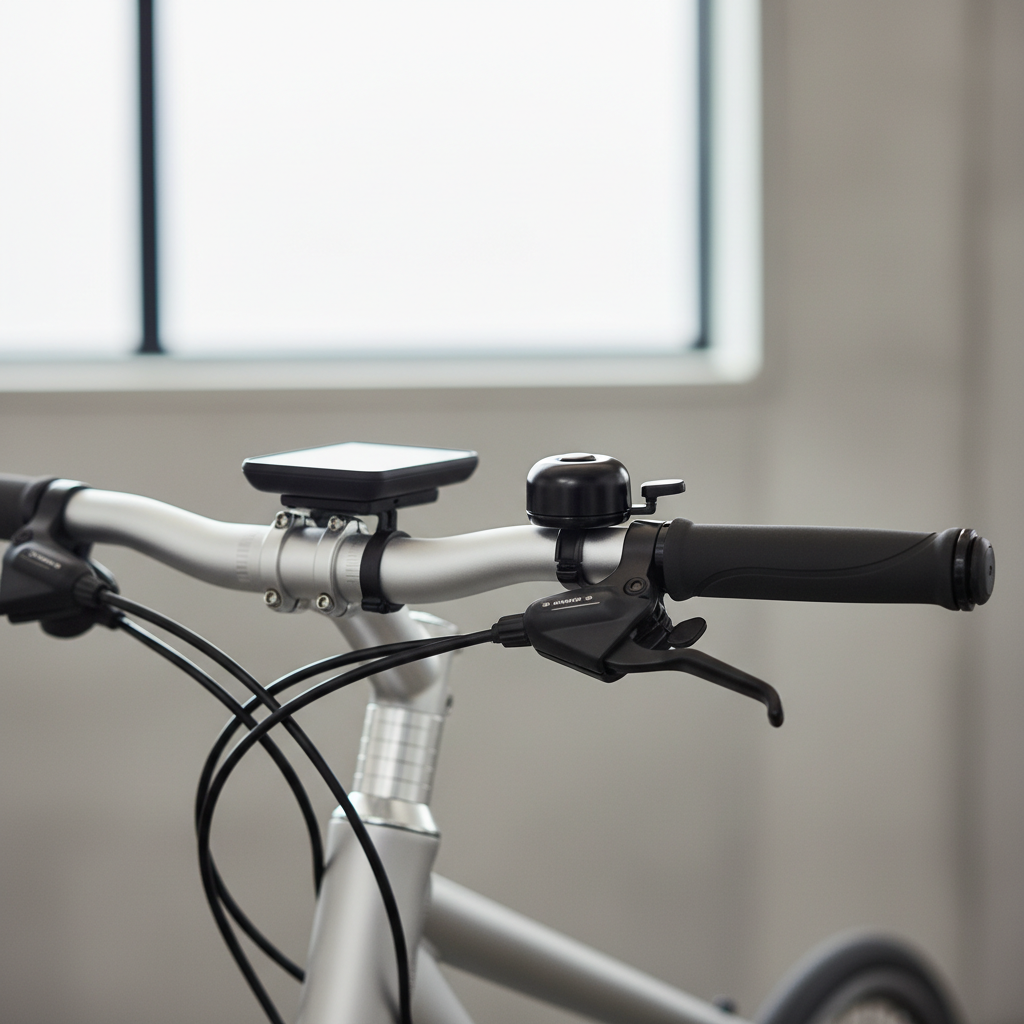
Common “good spots” that work in real life:
- Flat bars: near the grip, just inside the brake lever clamp
- Drop bars: on the tops near the stem (if reachable), or on the flat part near the hoods using a bell designed for drop bars
- E-bikes / crowded cockpits: whichever side has fewer controls, sometimes slightly angled downward
Two quick checks before tightening anything: your thumb should hit the striker without shifting your hand, and the bell dome should have clearance so it can resonate.
Step-by-step: how to install a bike bell on handlebars
Different bells look different, but the install sequence stays pretty consistent. Go slowly on the first snug, because this is where you set alignment.
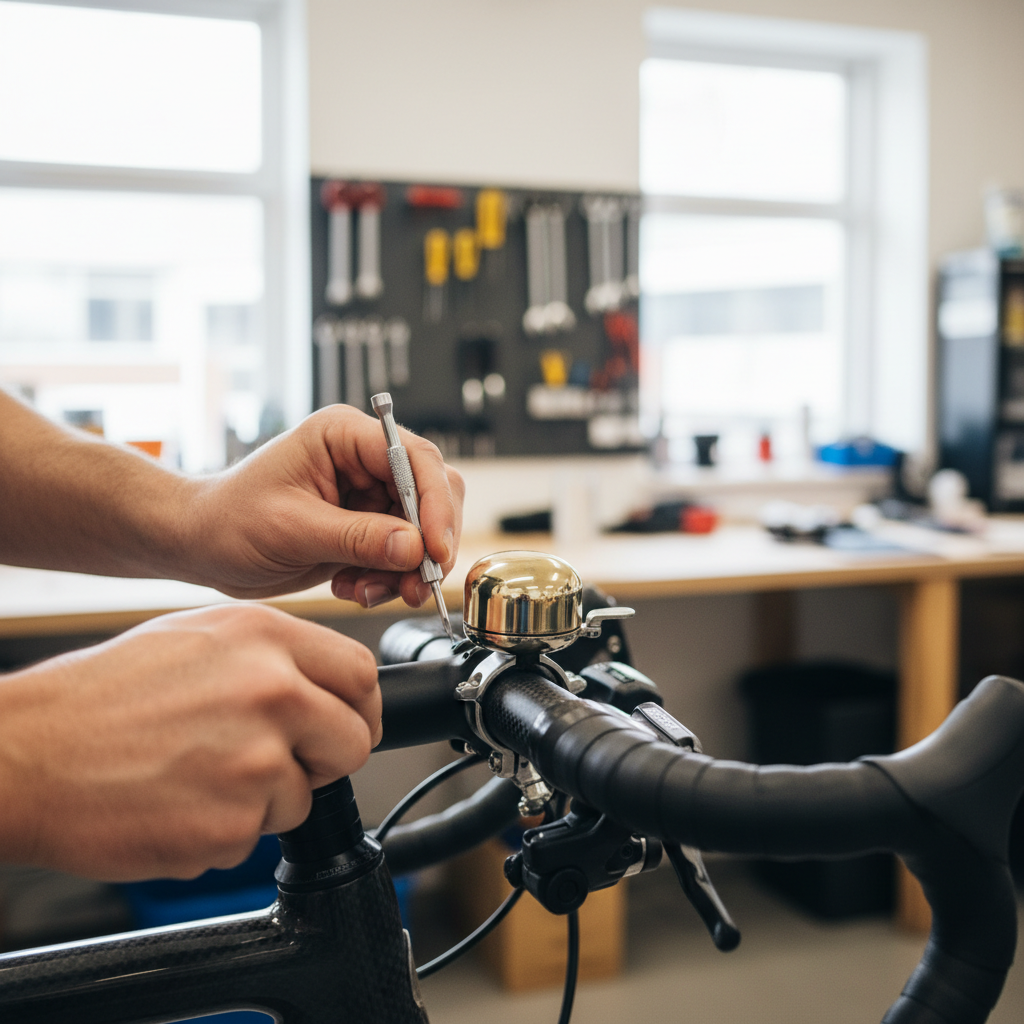
1) Clean the mounting area
Wipe sweat, sunscreen, dust, and any grease off the bar where the clamp sits. A clean surface helps prevent rotation at lower clamp force.
2) Open the clamp and position the bell
- For a hinged clamp, loosen the screw until it swings open, then wrap it around the bar.
- For a band clamp, thread the band around the bar and into the screw housing.
Set the bell so the thumb lever points naturally toward your thumb, and rotate the bell slightly if it avoids hitting a brake lever body.
3) Add the shim if needed
If the clamp feels “too roomy” or you can already tell it will bottom out before gripping, use the included rubber shim. If you don’t have one, a small strip of friction tape can work, but don’t build a huge stack that changes clamp geometry.
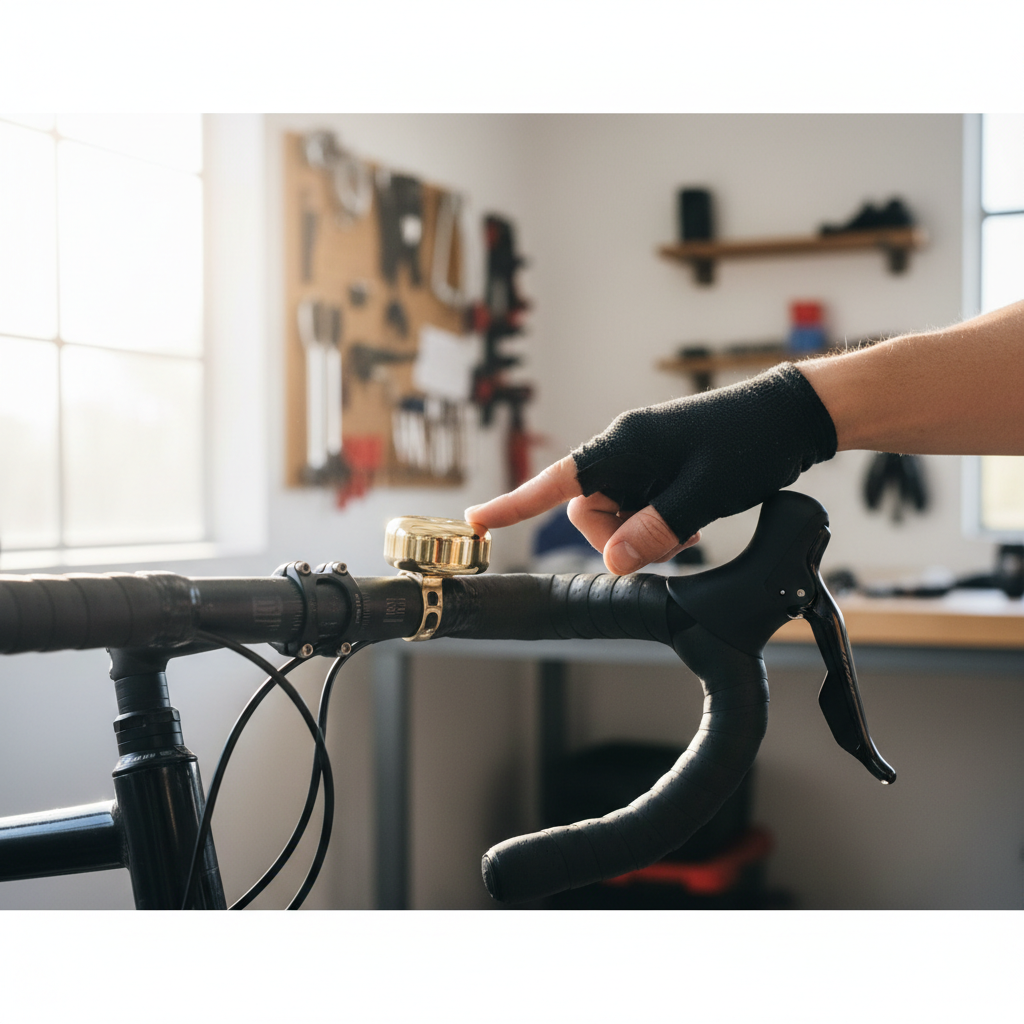
4) Tighten gradually, then align
Tighten the screw until the bell stops sliding with light hand pressure, then do a micro-adjust so the striker is where you want it. After alignment, snug it a bit more.
- Metal handlebars: typically tolerate a firm snug, but avoid stripping the screw.
- Carbon handlebars: use extra caution, and if torque specs exist for your bell or bar, follow them. When in doubt, consult a local bike shop.
5) Test the ring and clearance
- Ring it while seated, hands in your normal position.
- Turn the bars fully left and right, confirm cables don’t snag the bell.
- Squeeze brakes and shift through gears, confirm nothing rubs.
Key point: if you need to re-tighten after the first ride, that’s normal. Many clamps settle slightly after vibration.
Fast self-check: is your install “good enough” or will it slip?
Use this quick list before you call it done. It’s a small habit that saves you from mid-ride fiddling.
- No rotation: you can push the bell sideways with your thumb and it doesn’t twist on the bar
- Easy reach: you can ring it without moving your palm off the grip
- Clear sound: the dome isn’t touching cables, mounts, or accessories
- No interference: bell doesn’t block the brake lever, shifter, or your hand position
- Hardware looks seated: screw head sits flat, clamp halves align cleanly
Troubleshooting common problems (without buying a new bell)
The bell keeps slipping
- Clean the bar and the inside of the clamp, then reinstall.
- Add or replace the rubber shim.
- Move the bell to a slightly narrower section closer to the grip if your bar tapers.
The ring sounds dull
- Rotate the bell so cables aren’t touching the dome.
- Check if the striker is rubbing due to misalignment, loosen and re-center.
- If the bell is integrated into a clamp with a cover, confirm nothing is pinching it.
There’s no room because of lights, phone mount, or display
- Try the opposite side, many riders forget this option.
- Angle the bell slightly down or inboard, as long as the striker stays easy to reach.
- Consider a low-profile bell or a drop-bar-specific model if your cockpit is tight.
Safety notes and common mistakes to avoid
A bell seems harmless, but the install touches critical steering parts, so it’s worth being a little picky.
- Don’t mount on a grip or over grip tape where it can squirm as the material compresses.
- Don’t crush carbon: if you run carbon bars, avoid “as tight as possible” tightening, and consider professional help if you’re unsure.
- Don’t block controls: if the bell forces an awkward hand position, you may react slower in a surprise stop.
- Skip threadlocker unless the manufacturer suggests it: it can make later adjustments a hassle, and some plastics don’t love certain chemicals.
According to the League of American Bicyclists, being predictable and communicating around others is part of safer riding behavior, and a bell can help, but it doesn’t replace slowing down and passing carefully.
Practical tips for everyday use (so the bell actually gets used)
Once you know how to install a bike bell on handlebars, the next win is making it “muscle-memory easy” so you ring early, not at the last second.
- Practice at low speed: ring it a few times while rolling in a safe area until it feels automatic.
- Ring earlier than you think: people need time to process and move, especially with earbuds.
- Pair with your voice when needed: a bell plus a calm callout works better in crowds.
Conclusion
If your bell fits the bar diameter, sits within easy thumb reach, and stays put without over-tightening, you’re basically done. Take two minutes to test clearance and stability, then re-check after your first ride, small settling is common.
If you want a simple next step, set a reminder to inspect the clamp screw in a week, and if anything about carbon parts or torque feels uncertain, a local bike shop can usually confirm the setup quickly.