
how to install a bike rack on suv is usually straightforward, but the small setup details decide whether your bikes ride solidly or wobble, rub paint, or block lights. If you’ve ever tightened everything down and still felt nervous pulling out of the driveway, you’re not alone.
The good news is most SUV rack installs follow the same logic: match the rack style to your vehicle and bikes, mount on the correct attachment points, then do a short checklist that catches 90% of mistakes before you hit the highway. That last part matters more than people expect.
In this guide, I’ll walk through hitch, trunk, and roof racks, plus the quick measurements and safety checks that prevent most headaches. I’ll also flag the moments when it’s smarter to ask a shop for help, especially if your SUV has a hands-free liftgate sensor, fragile trim, or an unusual hitch setup.
Pick the right bike rack for your SUV (before you touch a wrench)
Before you install anything, confirm you’re choosing a rack that actually matches your SUV and your biking habits. A “works with SUVs” label can still hide fine print about spoilers, tire size, or e-bike weight.
- Hitch racks: most stable and easiest loading, but you need a compatible hitch receiver (commonly 1.25" or 2"). Great for frequent use.
- Trunk/liftgate strap racks: budget-friendly and no hitch needed, but can scuff paint and may interfere with rear wipers, cameras, or spoilers.
- Roof racks: keep the rear clear, but lifting bikes overhead is the tradeoff. Watch overall height for garages and drive-thrus.
According to NHTSA, cargo should be secured to prevent shifting or falling from a vehicle. A bike rack is basically “cargo security,” so stability is the whole point, not an optional upgrade.
Quick compatibility checklist (5 minutes that saves returns)
This is the fast self-check I’d do before opening the box. If you’re stuck on any item, pause and verify in your vehicle manual or the rack maker’s fit guide.
- Rack style matches your SUV: hitch size, roof rail type, or liftgate shape (spoilers and glass-heavy liftgates can be tricky).
- Bike weight and count: confirm per-bike limit and total limit, especially for e-bikes and fat-tire bikes.
- Frame compatibility: step-through frames often need an adapter for hanging-style racks.
- Clearance: exhaust outlet location, spare tire (rear-mounted), and liftgate opening.
- Visibility: tail lights and license plate should remain visible; if not, you may need a light bar or plate relocation, depending on state rules.
Tools and supplies you’ll actually use
You can install most racks with basic tools, but having the right small items keeps the job clean and prevents cosmetic damage.
- Torque wrench (recommended) and correct sockets/Allen keys from the rack kit
- Clean microfiber towel and car-wash soap (wipe contact points first)
- Isopropyl alcohol for final wipe where pads or suction surfaces touch
- Protective film (clear paint protection) for strap rack contact areas
- Thread locker (only if the manufacturer suggests it)
If the instructions specify a torque value, try not to “hand-feel” it. Under-tighten leads to wobble, over-tighten can crack plastics or deform parts.
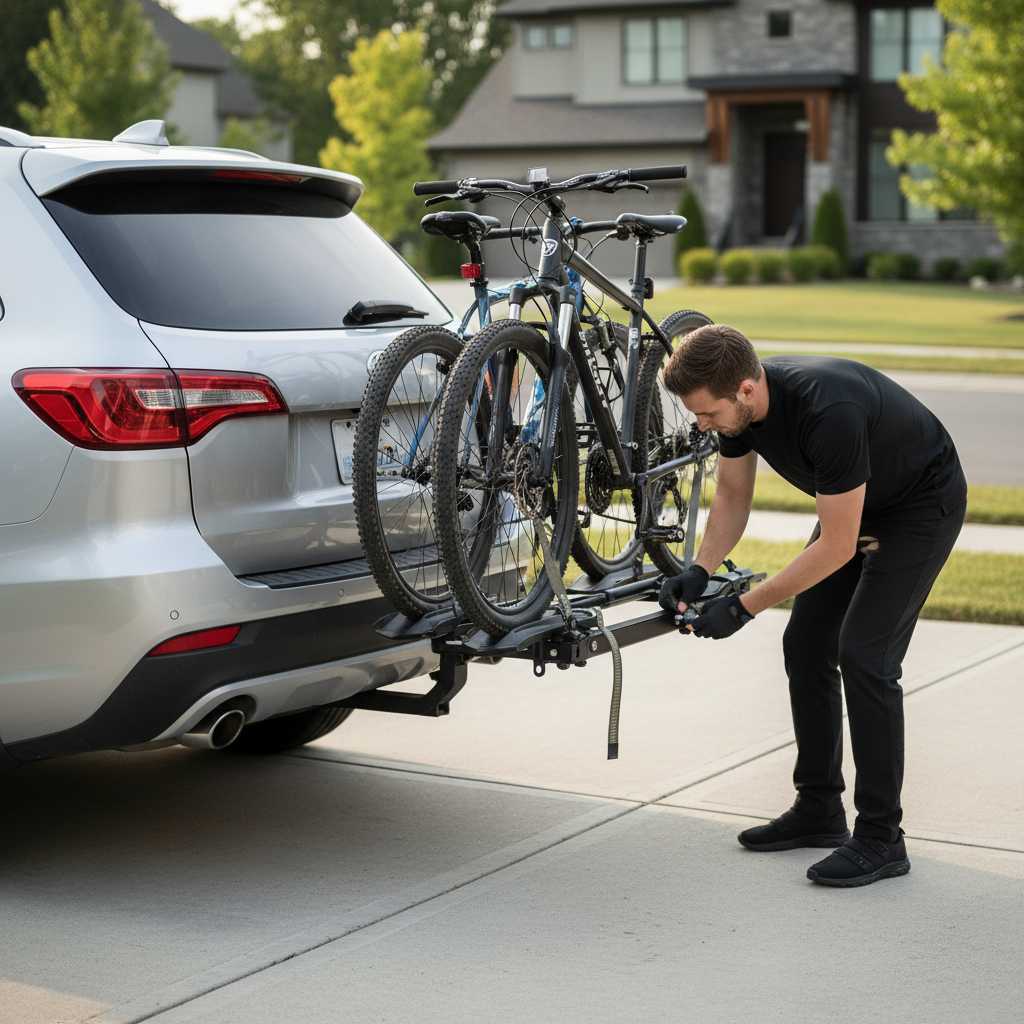
How to install a hitch bike rack on an SUV (most common setup)
If you want the least drama, a hitch rack is usually it. The steps vary a bit by brand, but the sequence stays consistent.
Step-by-step
- Confirm receiver size: look for “2 inch” or “1-1/4 inch” stamped near the hitch opening, or measure the inside width.
- Remove hitch plug and clear debris: road grit inside the receiver can prevent a snug fit.
- Insert the rack shank: slide in fully until the pin holes align.
- Install the hitch pin: use the included pin/lock, then secure the clip or lock cylinder.
- Tighten the anti-wobble mechanism: many racks use a threaded hitch pin or an expansion wedge; tighten to the stated torque.
- Set the rack angle: fold up/down and confirm it locks positively in each position.
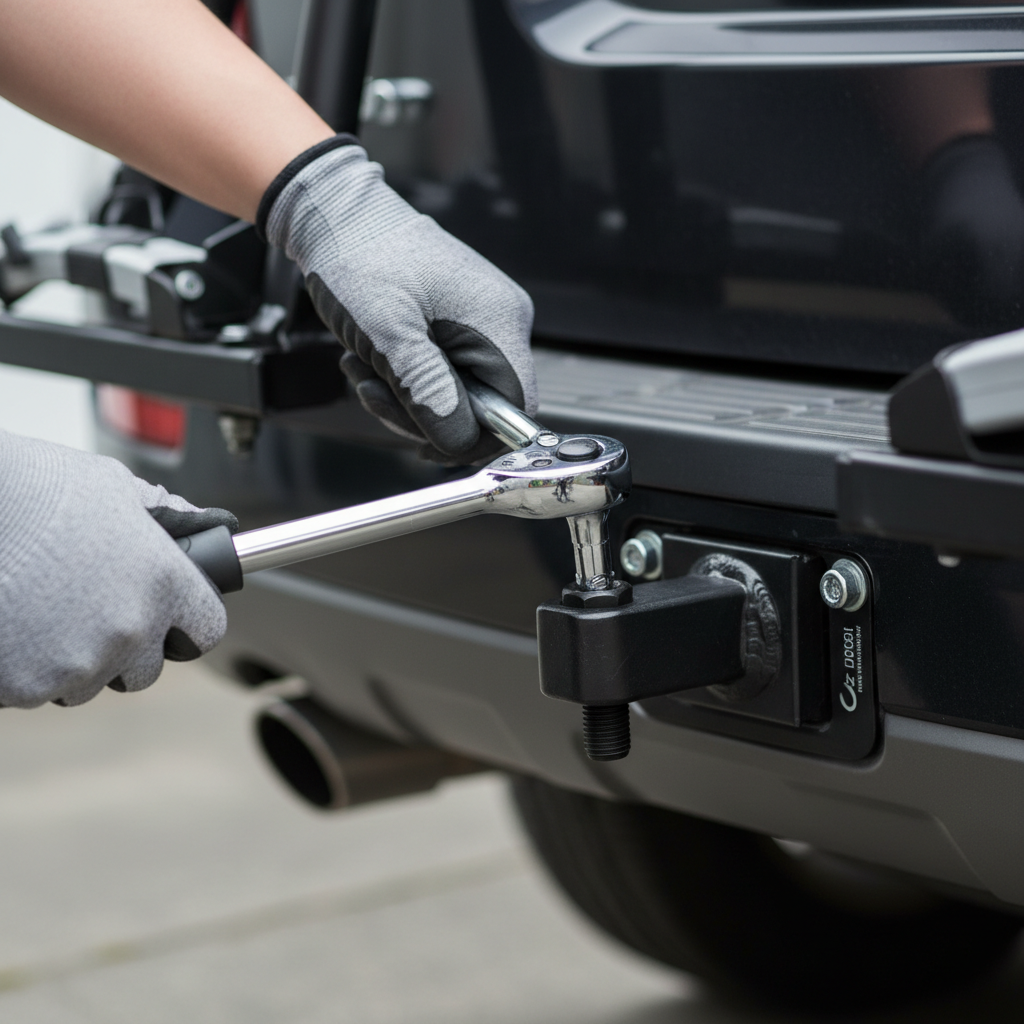
Key point: if you can move the rack side-to-side by hand at the receiver, you’ll feel that movement multiplied on rough roads. Tightening the anti-wobble feature usually fixes this, unless the rack is mismatched to the hitch size.
How to install a trunk/liftgate strap rack on an SUV (careful with paint and spoilers)
Strap racks work, but they’re less forgiving. Many complaints about “bad racks” are really about placement, strap routing, or dirty contact pads.
Step-by-step
- Clean the liftgate where pads will sit, then dry completely.
- Position the rack so top hooks sit on metal edges (not fragile plastic trim) and pads sit flat.
- Route straps correctly: top straps first, then bottom, then side stabilizers if included.
- Tighten evenly: alternate sides so the rack stays centered.
- Check spoiler clearance: if the SUV has a prominent spoiler, make sure straps aren’t bending it or resting on the lip.
Practical reality: if your SUV has a glass-heavy liftgate with limited metal edges, or a delicate spoiler, this rack type can be a poor match. In that case, a hitch rack (even a basic one) often becomes the cheaper option long-term.
How to install a roof bike rack on an SUV (and avoid the “garage mistake”)
Roof setups typically mean two layers: crossbars first, then bike trays or fork mounts. Many SUVs already have factory side rails, but still need crossbars that fit the rail style.
Step-by-step
- Install crossbars per the bar instructions, confirm even spacing and straight alignment.
- Mount the bike tray to the crossbars, tighten U-bolts or clamps to the recommended torque.
- Set tray position to minimize hatch interference if your SUV has a rear spoiler.
- Load the bike: clamp the front wheel or fork, strap the rear wheel, then shake-test.
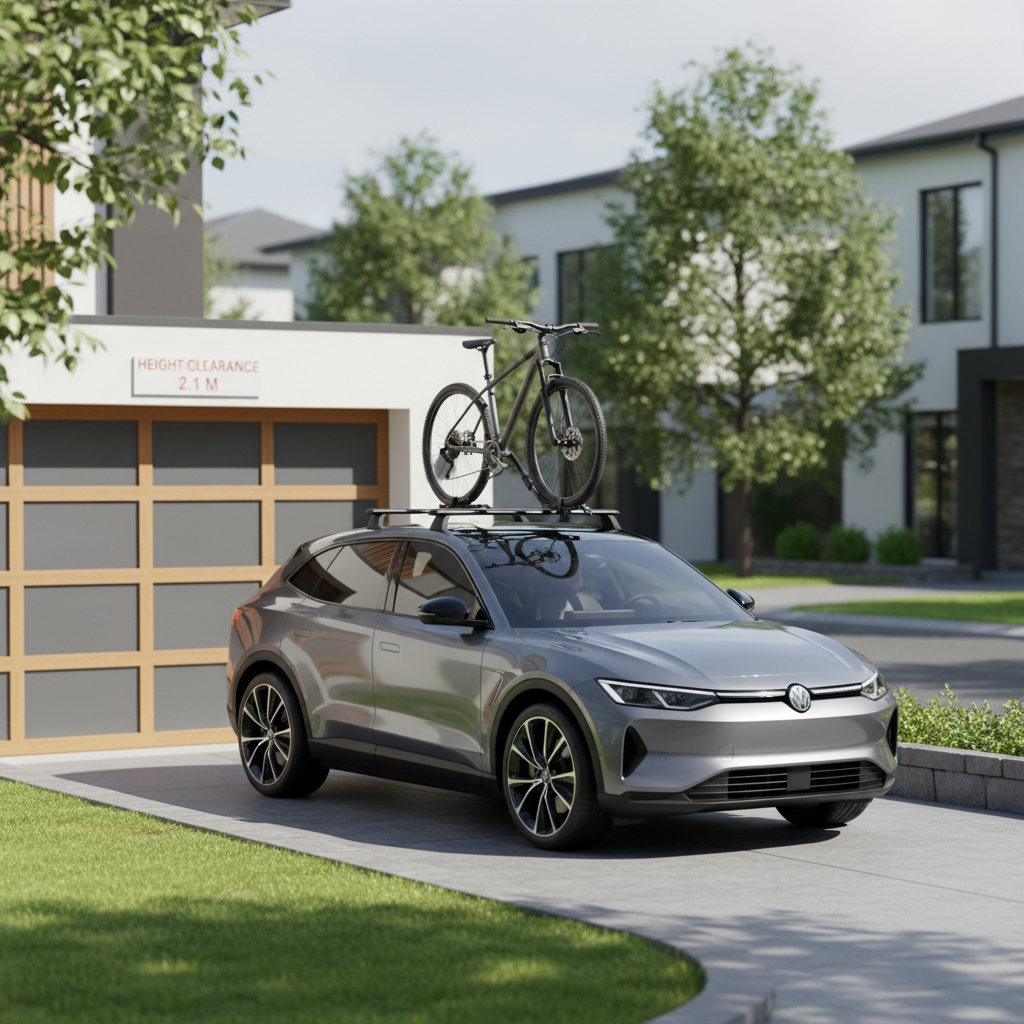
Do yourself a favor: write your new overall height on a small card and keep it on the dash. Roof racks fail most often when the install is fine, but the driver forgets the bike is up there.
Loading bikes correctly: where most wobble starts
Even a perfect install can feel unstable if bikes are loaded in a way the rack wasn’t designed for. This part is also where scratches happen.
- Heaviest bike closest to the SUV on hitch platform racks, unless the manual says otherwise.
- Stagger handlebars to prevent contact, especially with wide MTB bars.
- Secure frame contact points: if hooks touch paint, consider a protective sleeve or adjust the hook height.
- Remove loose items: pumps, bags, bottle cages with tall bottles can vibrate out.
- Extra strap for long drives: many people add a simple cam strap as a backup, but don’t strap to hot exhaust areas.
When people ask how to install a bike rack on suv “so it stops swaying,” the fix is often not the rack mount, it’s the bike-to-rack connection and the order you load bikes.
Safety checks before driving (and a short test drive routine)
This is the boring part that prevents the expensive part. Spend two minutes here, then do a quick loop around the block.
- Shake test: grab the rack near the base and shake; then grab each bike and shake independently.
- Confirm locks/pins: hitch pin seated, lock engaged, straps not twisted.
- Lights and plate visibility: stand 20 feet back and check what’s blocked.
- Hatch clearance: if you need trunk access, confirm tilt feature locks safely before using it.
- After 10–15 minutes: pull over and re-tighten straps or knobs as things settle.
According to AAA, securing loads and avoiding road hazards helps reduce crash risk. If anything feels “off” in the first mile, treat that as useful feedback and adjust right away.
Common rack types compared (quick table)
If you’re still deciding, this table helps frame the tradeoffs without pretending there’s one perfect answer for every SUV owner.
| Rack type | Best for | Watch-outs | Typical install difficulty |
|---|---|---|---|
| Hitch (platform) | Frequent rides, heavier bikes, easy loading | Needs hitch, can block plate/lights, adds rear length | Easy to moderate |
| Hitch (hanging) | Light bikes, occasional use, lower cost | Frame scuffs, step-through frames need adapter | Easy |
| Trunk/Liftgate strap | No hitch, short trips, budget setups | Paint/trim risk, spoilers, fit quirks, strap stretch | Moderate |
| Roof | Keeping rear access clear, multiple vehicles with bars | Overhead lifting, height clearance, wind noise | Moderate |
When to get help from a shop (it’s not overkill)
Some installs are “DIY-friendly,” others are “DIY-possible but annoying.” If any of these apply, a rack dealer or reputable bike shop can save time and prevent damage.
- Your SUV needs a hitch added and you’re unsure about towing-rated hardware or wiring.
- You have a hands-free liftgate sensor and the rack blocks it, or the rack triggers it unexpectedly.
- Your bikes are very heavy (common with e-bikes) and you’re near the rack’s max rating.
- You can’t keep the rack stable even after following the manufacturer torque specs.
- Your state or local area has strict requirements for plate visibility and you need a relocation solution.
And if you’re ever unsure about safe weight limits or hardware compatibility, it’s reasonable to consult the rack manufacturer or a qualified installer. Guessing gets expensive fast.
Conclusion: a solid install is mostly about fit, torque, and a repeatable check
how to install a bike rack on suv comes down to three decisions that matter: choose the rack style that fits your SUV and bike weights, mount it on the right attachment points without over-tightening, then do a quick shake-and-visibility check before every drive. Once you’ve done it a couple times, it becomes routine.
If you want one action step today, do this: verify your rack’s weight rating and your SUV’s hitch size or roof rail type, then follow the manual torque specs instead of “tight enough.” Your future self on the highway will appreciate that choice.