
The best bike light set usb rechargeable usually comes down to one thing riders rarely think about at checkout: whether the beam pattern and runtime match your roads, not just the lumen number on the box.
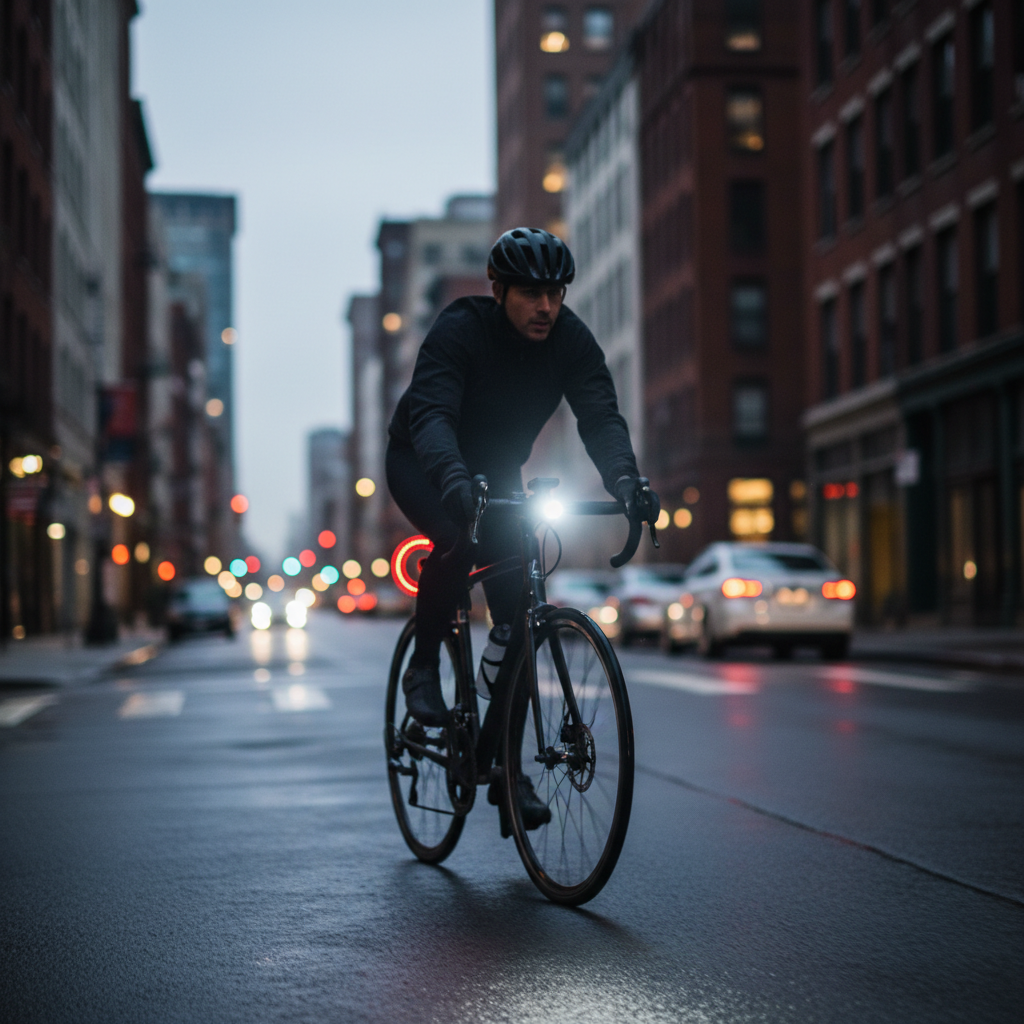
If you commute before sunrise, ride after work, or squeeze in weekend miles on mixed roads, a solid USB-rechargeable front-and-rear set saves hassle and makes you more predictable to drivers. But “rechargeable” covers a wide range, from tiny commuter lights to high-output trail-capable setups that need serious battery management.
This guide focuses on what actually changes your safety and experience: usable brightness, side visibility, weather resistance, mount stability, and charging habits. You’ll also get a simple comparison table and a quick self-check so you can pick a set that fits your riding style.
What “best” really means for a USB-rechargeable bike light set
Most people shop by lumens, but beam shape + runtime + mounting tends to matter more in day-to-day riding. A light that’s bright for 30 minutes on “turbo” may be worse than a slightly dimmer light that runs steady for your full commute.
- Be seen vs. see the road: A front light for visibility can be modest, but for unlit roads you want a focused beam with a usable hotspot and spill.
- Daytime conspicuity: A rear light with a distinct pulse pattern and decent output helps in daylight traffic.
- Mount stability: If the front light droops after bumps, your “bright” light becomes useless fast.
- Charge convenience: USB-C is trending for a reason, but micro-USB still exists. Shared cables reduce friction.
According to NHTSA, a meaningful share of cyclist fatalities occur in low-light conditions, so lighting is not only about comfort, it’s basic risk management. Exact setup still depends on your environment, speed, and traffic mix.
Quick comparison table: common set types and who they fit
Instead of “one winner,” most riders do better picking a category, then choosing within it based on mounts, charging, and beam.
| Set type | Best for | Typical front output | Rear light focus | Trade-offs |
|---|---|---|---|---|
| Commuter visibility set | Lit streets, bike lanes, slower speeds | 200–500 lumens | Wide angle, attention-grabbing flash | May not illuminate dark roads well |
| All-road commuter set | Mixed lighting, early morning rides | 600–1000 lumens | Brighter steady mode + flash options | Larger lights, more charging to manage |
| Performance road set | Faster riding, longer distances | 800–1500 lumens | High visibility with long runtime modes | Price climbs, mount quality matters |
| Trail-capable set | Unlit paths, occasional off-road | 1200+ lumens (usable beam) | Strong lens/optics, rugged housing | Heavier, can create glare if aimed wrong |
How to choose the best bike light set usb rechargeable (without overbuying)
If you want the best bike light set usb rechargeable for your needs, decide what problem you’re solving first: visibility to others, road illumination, or both.
1) Front light: look past lumens
- Beam cutoff (nice to have): Some commuter lights shape the beam to reduce blinding oncoming riders.
- Useful mid modes: You’ll live in the 300–700 lumen range more than “turbo” in many cases.
- Side windows: Side visibility can help at intersections.
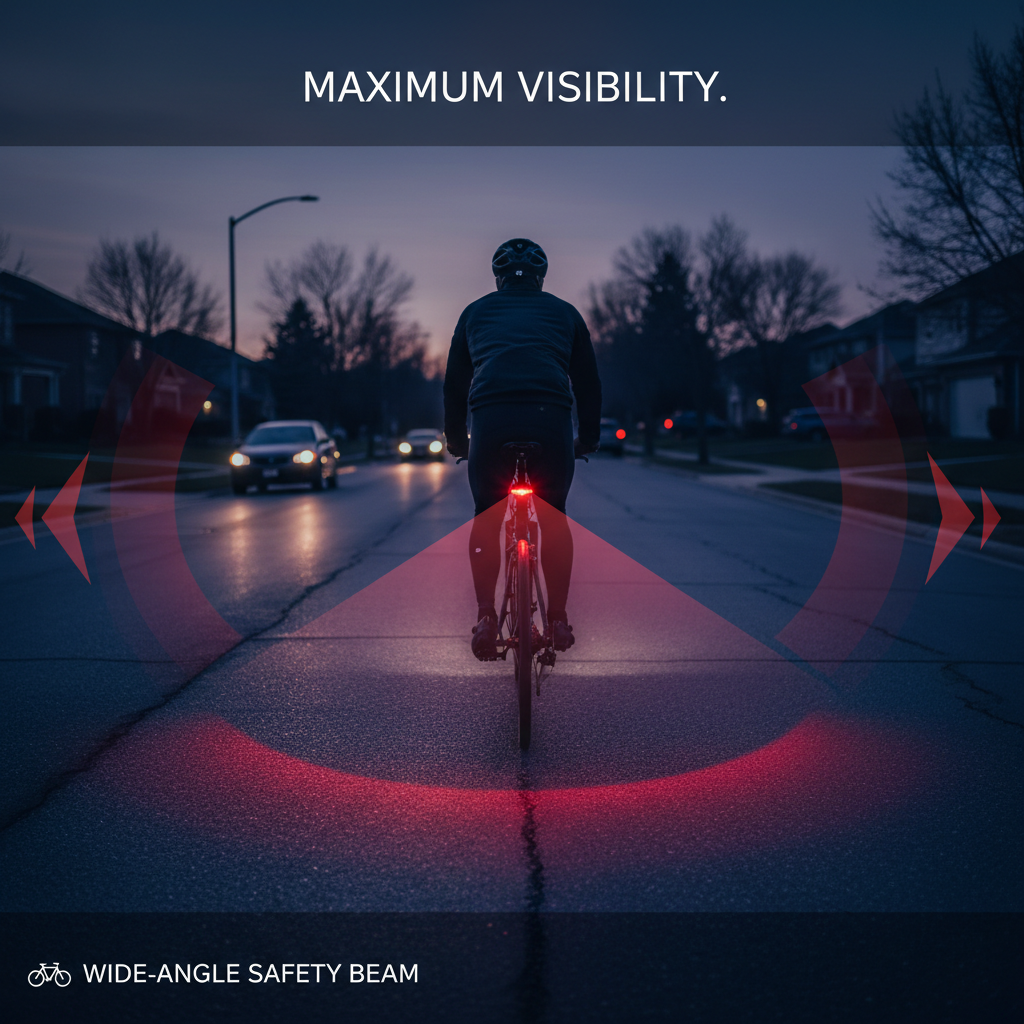
2) Rear light: prioritize angle and pattern
- Wide-angle lens: Makes you visible off-axis, not only from directly behind.
- Day flash mode: Helpful on bright roads, but check local rules and personal tolerance for intense strobing.
- Mount flexibility: Seatpost shapes vary, and some riders prefer helmet or bag mounting.
3) Battery and charging: focus on routine, not specs
Runtime claims often vary by mode and temperature, so treat them as rough guidance. What matters is whether the set supports your weekly rhythm.
- USB-C vs micro-USB: USB-C is more convenient for many households, but either can work if you keep a dedicated cable.
- Battery indicator: A clear low-battery warning prevents surprise shutdowns mid-ride.
- Charge-through use: Some lights can run while charging from a power bank, useful for long rides, though cable management gets annoying.
4) Weather rating and build quality
In many US regions, rain happens when you least want to think about it. Look for IP ratings when available.
- IPX4: Often fine for rain and splashes.
- IPX6/IPX7: Better for heavy rain or lots of road spray, especially on fenders-free bikes.
Self-check: which setup matches your rides?
Answer these quickly, and you’ll narrow the field fast.
- I ride on unlit roads at least once a week → plan for a front light with a stronger beam and a stable mount.
- I mostly ride in traffic with streetlights → prioritize conspicuity: side visibility, reliable rear flash/steady options.
- My rides exceed 60–90 minutes regularly → value efficient mid modes and a clear battery gauge.
- I park outdoors or lock up at work → quick-release matters, otherwise lights get “borrowed.”
- I hate charging → pick a set with longer runtimes at practical brightness, not a monster lumen rating.
Real-world buying criteria (the stuff that causes regret)
This is where many “top lists” get fuzzy. A few practical checks usually prevent disappointment.
- Mount compatibility: Aero handlebars, oversized bars, and carbon posts can be picky. Check strap length and included shims.
- One-button UX: If mode switching requires memorizing patterns, you’ll use the wrong mode at the wrong time.
- Heat management: High-output lights can throttle when hot. That’s normal, but it means turbo is a short burst, not a cruise setting.
- Glare control: Aim your front beam so it lights the road, not drivers’ faces. It’s safer and reduces angry interactions.
According to League of American Bicyclists, being visible and predictable is a core part of safer riding behavior. Lights help, but they’re not a substitute for positioning, signaling, and speed choice.
Setup steps: get more safety from the same lights
Even the best bike light set usb rechargeable won’t help much if it’s aimed wrong or mounted loose. This takes five minutes and pays off every ride.
Front light aiming (quick method)
- On flat ground, point the beam so the brightest hotspot hits the road ahead, not eye level of oncoming traffic.
- Do a short roll test, if the beam bounces, tighten or reposition the mount, sometimes moving closer to the stem helps.
- If your light has a “commuter cutoff” lens, keep it level, angling down defeats the point.
Rear light placement
- Mount as centered and unobstructed as possible, avoid saddle bags blocking it.
- Use steady mode in group rides when appropriate, intense strobing can annoy or distract others.
- Add a second rear light for high-traffic routes if you want redundancy, many riders do this for peace of mind.
Mistakes to avoid (common, and totally fixable)
- Buying only for “max lumens”: You’ll rarely use it, and it may create more glare than value.
- Using flash everywhere: In fog or heavy rain, certain flash patterns can be harder to judge for distance, consider steady or a gentler pulse.
- Forgetting daytime needs: Many collisions happen at intersections, daytime visibility matters, not only night rides.
- Skipping weekly charging: A simple habit, like charging every Sunday night, beats any spec sheet.
When to consider professional help or a different solution
If you ride in complex conditions, it can be worth asking a local bike shop to check your setup. This is especially true if you have:
- Recurring mount slippage on carbon bars or an aero cockpit
- Electrical concerns, damaged ports, or swelling batteries, stop using the light and ask a professional
- Vision issues that make night riding difficult, a clinician may help assess what lighting and contrast levels are safer for you
For e-bikes or higher-speed commuting, you might also consider a dynamo or hardwired solution, since charging discipline becomes a bigger factor at higher weekly mileage.
Conclusion: what to buy, and how to feel good about it
The “best” set is the one you actually keep charged, aimed correctly, and turned on every ride. For many US riders, that means a USB-C rechargeable front light with a strong mid mode and a rear light with wide-angle visibility and simple controls.
Key takeaways:
- Match the beam to your roads, not just the lumen claim.
- Prioritize rear visibility with wide angle and useful patterns.
- Pick a charging routine you can stick to, convenience wins.
If you want a practical next step, write down your typical ride length and the darkest segment of your route, then shop within the set category that fits those two details. You’ll avoid overpaying, and you’ll avoid under-lighting, which is the more expensive mistake.
FAQ
What lumens should I look for in a USB rechargeable bike light set?
For lit city streets, many riders feel comfortable around 200–500 lumens up front, mainly to be seen. If you ride on dark roads, 600–1000 lumens with good optics is a more common target, but beam quality still matters more than the top number.
Is USB-C necessary, or is micro-USB still fine?
Micro-USB can be fine if you already have cables and you charge consistently. USB-C tends to be more convenient and durable for frequent charging, so it’s often the easier long-term choice, especially if your other devices are USB-C.
How long should a bike light set last on a single charge?
For commuting, a realistic goal is enough runtime to cover your longest ride plus a buffer, using the mode you’ll actually run. Many sets advertise long runtimes on low settings, so check that the mid setting duration matches your needs.
Are flashing rear lights always safer?
Often they help attention in daytime traffic, but not every situation. In heavy rain, fog, or group rides, a steady or softer pulse may be easier for others to judge, and sometimes more considerate.
Can bike lights be too bright for road use?
Yes, glare can be a real issue. A very bright light aimed too high can blind oncoming riders and irritate drivers, which is a safety problem. Aim the beam at the road and use “turbo” only when you truly need it.
What makes a rear light “good” besides brightness?
Lens design and side visibility matter a lot, because cars approach from angles and lanes. A secure mount and a pattern you can tolerate using every ride also matter, because consistency beats occasional overkill.
Do I need two rear lights?
You don’t always, but redundancy can be helpful for long commutes or high-traffic routes, especially if one light runs out or gets blocked by a bag. If you add a second, use different patterns to stand out without becoming chaotic.
What’s the simplest way to maintain rechargeable bike lights?
Wipe the lens, keep the charging port clean and fully closed, and stick to a schedule. If the battery starts dropping unusually fast, it may be aging, at that point replacing the light can be more sensible than fighting it.
If you’re trying to choose a set quickly, focus on your route, runtime at mid brightness, and a mount that won’t slip, then narrow from there, it’s the most reliable way to land on a best bike light set usb rechargeable match without guesswork.